Montech X3 Mesh Review
Introduction
Every case has something it tries to be the best in. Some have a great feature set, others have perfect build quality. The Montech X3 Mesh, however, tries to win over the budget and first-time builder marked by being pre-filled with a total of 6 "RGB" fans! Let's how the X3 Mesh turns out, and if the included fans are actually usable.
Positive
- 6x "RGB" Fans
- Great Airflow
- Removable HDD cage
- Price
Neutral
- "RGB" is composed of hard-colored LEDs
Negative
- Fans are powered via molex
What's in the Box?

Just like most other cases, the X3 Mesh comes in a big brownish carton box. Inside, we can find the Montech X3 Mesh covered in some plastic and held in place by a couple of styrofoam blocks.
Inside the case, we will also find a manual.
Specs
The Montech X3 Mesh comes with a quite long spec sheet, therefore we summarized all the important points down below:
| Name | Montech X3 Mesh |
| Type | Mid-Tower |
| Mainboard Size | ATX, microATX, ITX |
| PSU Size | Up to 170mm if HDD cage is installed |
| PSU Position | Separate compartment in the bottom |
| Color | Black |
| Side Panel | Tempered Glass |
| Front Panel | Mesh (metal) |
| CPU Cooler Height | 160mm |
| GPU length | 305mm |
| 2.5" Drives | 2x behind the motherboard, 2x inside/on HDD Cage |
| 3.5" Drives | 2x inside/on HDD cage |
| IO | 2x USB 2.0, 1x USB 3.0, Audio in/out |
| Dimensions | 370x210x480mm (LxWxH) |
| Fan Spots |
3x 120/140mm in the front 2x 120/140mm in the top 1x 120mm in the back |
| Pre-installed Fans |
3x 140mm in the front 2x 120mmin the top 1x 120mm in the back |
| Watercooling |
up to 360mm radiator in the front up to 280mm radiator in the top 120mm radiator in the back |
| Extras | The lighting switch on the IO Panel starts/stops the "RGB" |
Compatibility

For the compatibility, Montech made sure to include everything we would expect from a mid-tower case of this size.
On the Motherboards side, we can use up to ATX sized boards.

The PSUs can also be used with their ATX standard. Here we found there to be +- 17cm of space. If however, you are not planning to use any Harddrives inside your build, you can remove the unnecessary hard drive cage and enjoy the longest PSUs, as well as severely simplify your cable management.

On the GPU side, we can use up to 305mm long GPUs, meaning that we can even fit these new RTX 3000 cards.

In terms of cooling, the X3 Mesh allows for up to 160mm high coolers Air coolers. If however, you are planning to go with Watercooling, we found there to be place for a up to 360 rad in the front, up to 280 rad in the top as well as a 120mm rad in the back.
For the Drives, Montech includes 2 SSD brackets behind the motherboards, as well as the beforementioned hard drive cage behind the PSU location, which can fit up to 2x 2.5" Drives or 2x 3.5" drives.
IO

As the Montech X3 Mesh is clearly targeted at the Budget-oriented market, they also included a Budget oriented IO.
With 1x USB 3.0 and 2x USB 2.0, we find the setup to be sufficient for everyday use, although we believe this is one of the first things to update with a newer version.
Cable Management

The cable management within the X3 Mesh is surprisingly efficient. With a couple of cable cutouts around the mainboard and the usual zip-tie hoocks, we found exactly what we expected, however, we were surprised about the amount of space between the motherboard tray and the backplate.
Build Quality

Usually, the build quality is the first point at which a company is trying to save some money in favor of a budget-friendlier price.
This is also partially true for the X3 Mesh.
The metal used for this case is as thin as it gets, creating a highly bendable and outer frame that starts to deform as soon as slight pressure is being used.

One of the best features of the X3 Mesh is its usage of a hinge and magnet system for the tempered glass side panel instead of the usual heap screws. On our model, however, the door doesn't fully close on its own and requires a slight helping push for the magnets to actually attach to each other.
The only part in which this doesn't apply is the Mesh-material used in the front. Despite our previous findings, the Mesh-like structure is surprisingly rigid and sturdy compared to the rest of the case.
Cooling

The cooling concept within the Montech X3 Mesh is pretty straightforward. Cold air in at the front and out in the back and top.
Most cases use this tried and proofed concept. But for most cases, you will need to implement it yourself.
Inside the X3 Mesh, however, you don't. Instead of letting you choose your own fate, Montech pre-fills every fan spot with its own in-house-made fans.
3x 140mm in the Front, 2x 120mm in the Top, and 1x 120mm in the back.
Getting a case in such a state does not require you to take any further action, and you can immediately proceed to the rest of your build.

The Front of the Case is covered in a Mesh-like metallic structure which allows a lot of air to pass through. This front panel is solely responsible for the cases surprisingly good working cooling performance, creating one of the first pure-budget-oriented cases we've seen so far, which also come with a great cooling concept.
The "RGB" Fans

The Fans which were used by Montech are not "unusable" in any sense of the word.
We benchmarked the Fans by using our Ryzen 3700x locked at 4.2Ghz and 1.4vCore and Montech's own Air 210 Cooler on top.

Here, we found that the pre-installed fans allowed the CPU to stay at 75°C.
Replacing all of the Fans with Arctic P12s and P14s changed the CPU temperature to slightly cooler 72°C.
Even if this test does not allow for a perfect comparison, it still demonstrated that the included "free" fans are perfectly fine to be used with mid-tier to higher-tier hardware without any thermal issues.
That being said, there are a couple of other issues with these fans.
The first point would be the "RGB". Instead of what you would expect, there are a couple of lights on each fan. Each of these LEDs has a specific color...
And that's it.
Even if it is true that you could consider the combination of different colors to be "RGB", there is absolutely nothing controllable on these lights.
The only thing you are able to choose is if they should be on or off, which can be done by using the "Light Switch" found at the top of the case.

The other issue with these fans is how they are being powered. Instead of any sort of PWM or 3-Pin fan header, the included fans inside the X3 Mesh are powered by a Molex connector.
To make things worse, each of the fans got its own connector which is being pushed into the next one with 2 additional ones at the end which make up the circuit for the "light switch" to work.
All of this ends up with an astonishingly long Molex centipede that spans almost half of the case's height and needs to be somehow hidden behind the motherboard tray.
Using an ancient power connector would not be that much of an issue if it weren't for the Fan speed issue it creates. Using Molex as a Fan Power source results in the Fans spinning at 100% of their speed all the time. This then leads to them blasting all the time without you having any control to stop it.
At this point, we would also like to mention that even if the Fans and thus also the case are a bit loud, it is by no means unbearable.
Installation

For this case, we used the following components:
- ASRock B450M Pro-F
- AMD Ryzen 3700x
- Palit RTX 2060 Super
- 2x Corsair Vengence
- Be Quiet Pure Power
- Montech Air 210
The installation process was as easy as it was in the past with cases in this form factor.
After removing the Tempered Glass panel by opening it at a >90° angle and removing the HDD cage, there was a surprising amount of space inside the case, making it an enjoyable experience.
There was no squeezing whatsoever, every component was directly accessible.
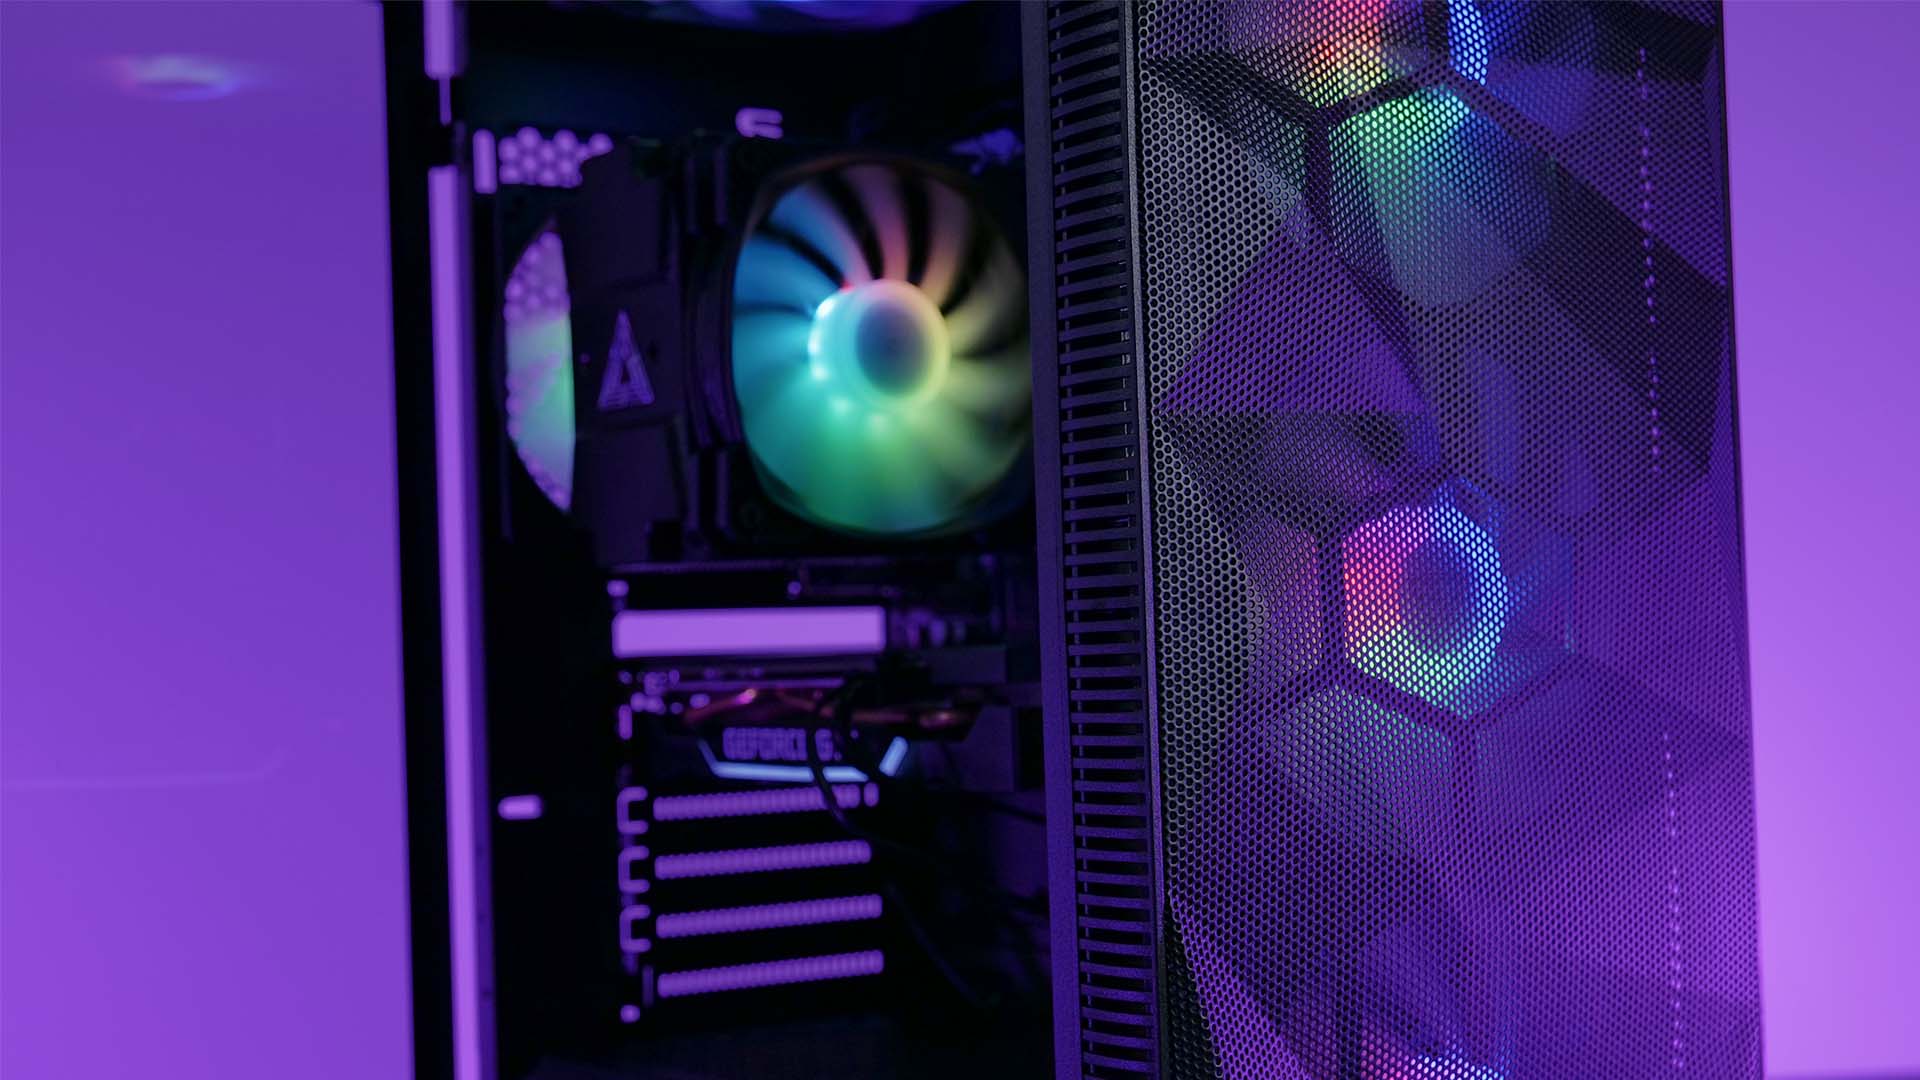
In general, there was no issue whatsoever, but we would have appreciated getting a bag of goodies containing some zip ties, as we needed to somehow manage the Molex-centipede behind the motherboard.
The fact that every fan was already pre-installed made the installation process incredibly quick, and even if we would never speak in a positive manner about a Molex powered fan, we need to admit that we also saved a huge amount of time and cable management by not needing to route 6x PWM cables to the motherboard.
Conclusion

In general, we can summarize the case with a simple sentence. "The Montech X3 Mesh gets the job done".
The X3 Mesh might not be the best build case we've seen, nor is its IO up to date. The included "RGB" Fans are made by using colored LEDs and are powered by Molex.
Although all of this might be true, we believe that the X3 Mesh is a perfect contestant for the first-time builder group.
By pre-filling the case with 6 Fans, even if static RGB and Molex, Montech created a scenario in which a new user can get a Case and forget about buying any additional fans. Something that we have found to be a quite common problem out there.
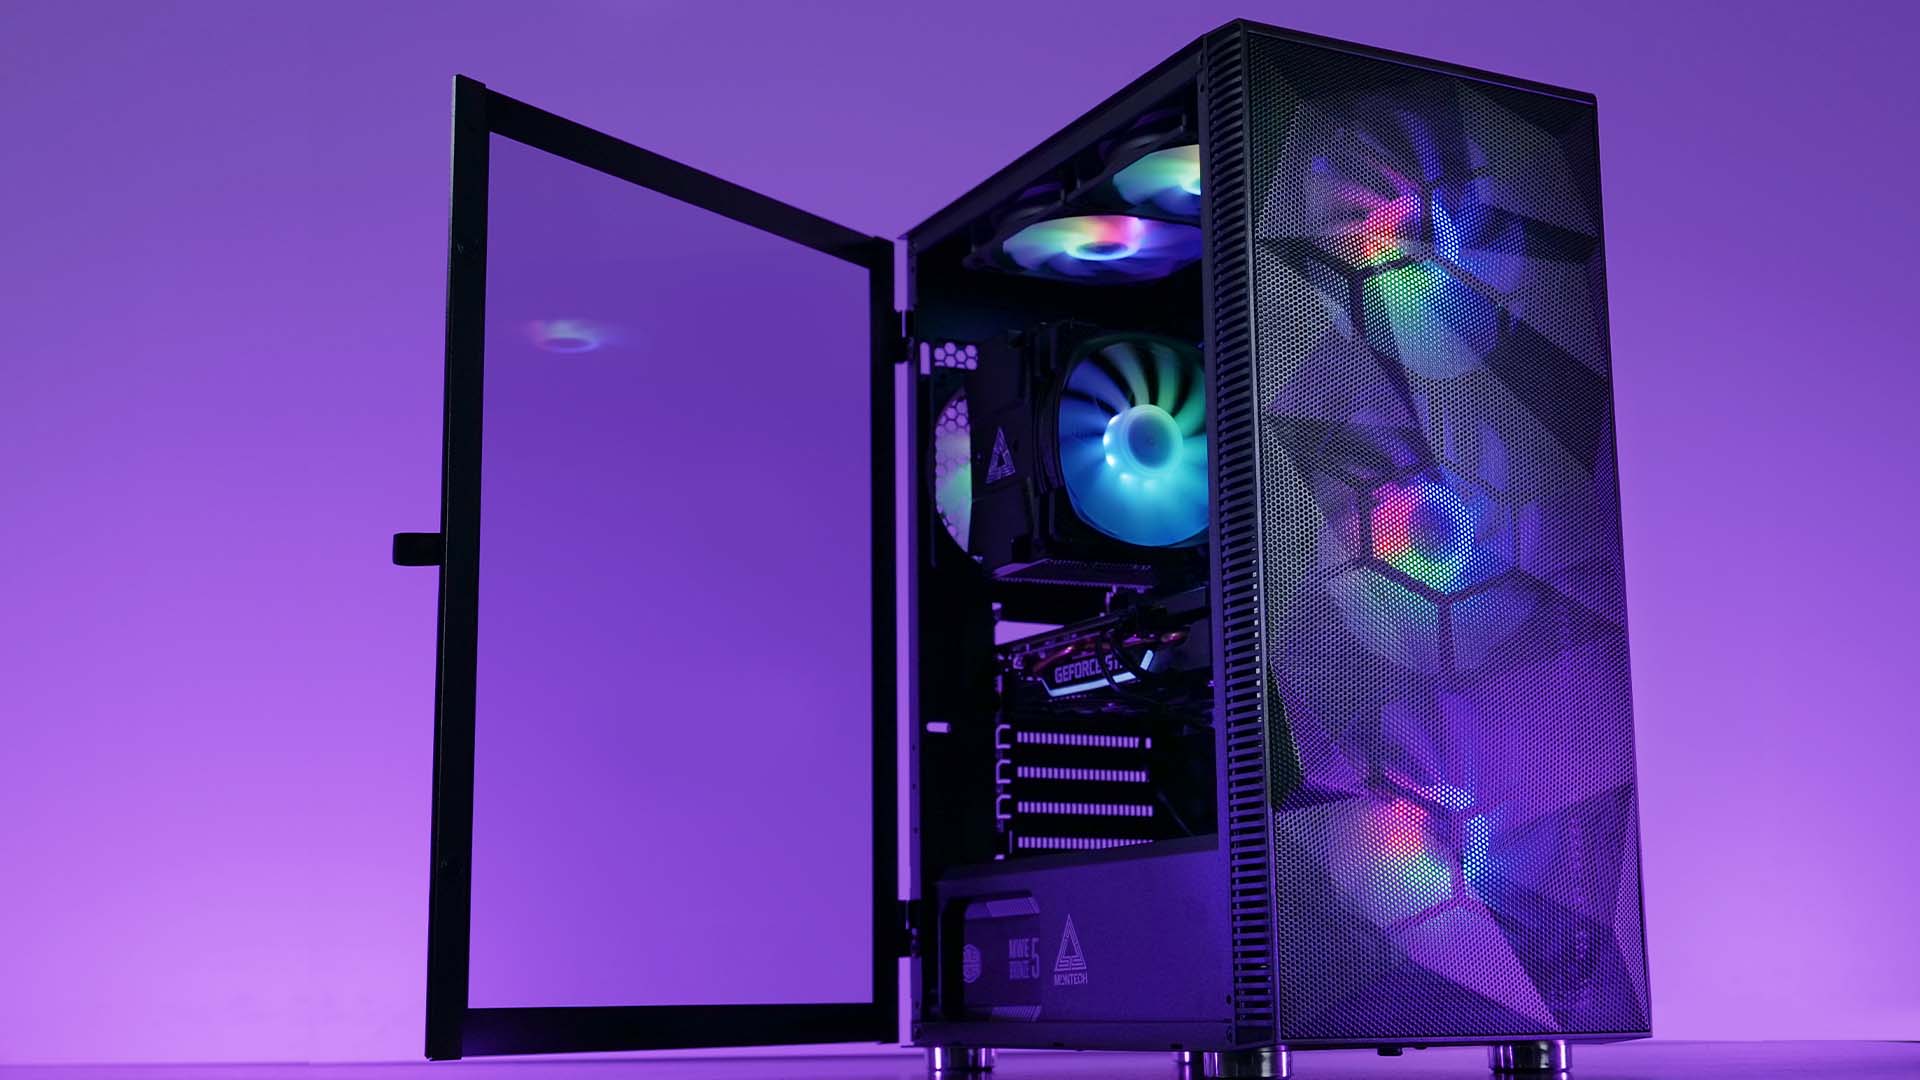
This is also strengthened by the fact that our benchmarks showed us that even though these are not the best performing fans, they are working perfectly fine with mid-to-higher range hardware. However, if the user is planning to use the case for an extended period, thus planning to upgrade some components down the line, he is perfectly able to do so as the Mesh-like front panel allows for so much air to be passed through, that no matter which fans he installs, it will work great. All of this creates the perfect beginner case, which in our opinion is also usable on a long-term basis with a couple of upgrades later on.
As of writing this review, the Montech X3 Mesh is available at +- 69€ or 69$. This price might seem to be a bit high at the beginning, but do not forget that there are 6x Fans included inside this case. As we researched other Budget oriented cases, we found there to be no match for the X3 Mesh. The cases had either terrible Airflow or no Fans, ending up being much more expensive once the fan spots were filled.
If there is one thing that we would love to see changed, then it would be replacing the fan's Molex power with PWM control. By upgrading the Fans with PWM control, the users will be able to control the Fan speed, creating a way quieter case.

All in all, we were very surprised by what the X3 Mesh had to offer. It may not be the perfect case, but we truly believe that if the job needs to be done quickly, cost-effective, or if you are a newcomer to the self-build pc world, it won't get much better than that.


Inter-Tech RS-08 Review
Inter-Tech released another set of Fans. Under the Argus name, Inter-Tech included a completely new feature in their RS-08 Mo
Read More
Inter-Tech C-701 Panorama Review
There are a lot of beautifull PC cases out there. The Inter-Tech C-701 Panorama is surely one of them. Lets take a closer loo
Read More
Noctua NF-S12A Chromax Black Review
Out of every existing Noctua NF Series Fan, their S12As are the Airflow kings. After having already reviewed the F12, witness
Read More
Arctic Liquid Freezer II 420 / ARGB Review
Arctics Liquid Freezer II Lineup is known to be one of the best on the market. Each time we review one of them it pushes the
Read More