Phanteks Enthoo 719 Review
Introduction
Phanteks has already built quite a few incredible cases. The Enthoo 719 is no different. Packed full of incredible features and ridiculous possibilities, the Enthoo 719 promises to deliver everything you could wish for inside an enormous case!
Positive
- Build Quality
- Fan Support
- Radiator Support
- CPU Cooler Support
- GPU Support
- Out-of-the-box Dual System
- HDD/SSD Support
- 4x USB 3.0 Type A
- 3-Slot Vertical GPUs
Neutral
Negative
- Front/Top feels plasticky due to Plastic rails on the sides
What's in the Box?

Similarly to other Phanteks cases, the Enthoo 719 comes with a real Phanteks-like box of treats. Not only is the case wrapped in extremely thick and stiff foam blocks, but it is also covered by an additional layer in form of a fabric bag protecting it against any sorts of scratches.
Inside the same box we will also find a special mini-box containing the extra treats:
- Organized box of screws
- Zip Ties
- Mout for vertical GPU Riser (riser not included)
- 4x HDD/SSD Brackets
- GPU Anti Sack Bracket
- Dual-System cover

For the included vertical GPU Riser mounting piece, we must give you a heads-up. Inside the Phanteks Enthoo 719, vertical GPU installations with up to 3 slots wide GPU is supported out of the box. The only thing you need to do this is to install it in the vertical slots and connect it using any riser that you purchased separately. (There is also a special bracket available that transforms the complete area into a 'more robust' version).
The extra piece which is included is in fact for the Dual System option. In case you are planning to do some insane build inside the Enthoo 719, you have the option to install a secondary system in the bottom of the case. This secondary system may need a GPU. As the only option GPU option available for that secondary system is a vertical orientation, this is where the mounting pieces comes into play. Just keep in mind that in order to use it you will need to get the separately available Phanteks vertical riser cable as not every riser will be compatible with this little bracket.
Specs
The Phanteks Enthoo comes with one of the most impressive feature sets we have seen so far. Down below we attached a summarized version of everything that can be stuffed into this monster.
| Name | Phanteks Enthoo 719 |
| Type | Full-Tower |
| Mainboard Sizes |
ATX eATX mATX miniITX SSIEEB |
| Color |
Grey Black |
| Side Panel |
Tempered Glass |
| CPU Cooler Height |
195mm |
| GPU Length |
503mm |
| 2.5" Drives |
3 in the back Additional 8 using the HDD/SSD Brackets on the Central Fan Spots Additional 4 using the HDD/SSD Brackets in the Bottom |
| 3.5" Drives |
8 using the HHD/SSD Brackets on the Central Fan Spots Additional 4 using the HDD/SSD Brackets in the Bottom |
| IO |
Power Button in the Top 1x USB 3.1 Gen 2 Type C 4x USB 3.0 Mic in/out RGB Control Buttons |
| Dimensions |
240x595x570mm (WxDxH) |
| RGB |
RGB Line on the right edge & bottom of the case RGB Line on the outside of the PSU Tunnel |
| Fans |
- |
| Fan Spots |
Front: 4x 120/3x140 Top: 3x120/140 Bottom: 3x120 / 2x120+140 Center: 3x 120 Back: 120/140 |
| Water Cooling |
Front: 480/420 Top: 360 Bottom: 360 Center: 480 Back: 120/140 |
| Extra |
Included ARGB Controller Included Fan Hub in the back |
Compatibility

As you might have already guessed, the compatibility list for this giant full tower is quite long. Therefore we broke it into individual components.
Fans

The fan support inside the Enthoo 719 is just massive.
The front of the case supports up to 4x 120mm or 3x 140mm fans.
The top of the case supports up to 3x 120mm or 140mm fans.
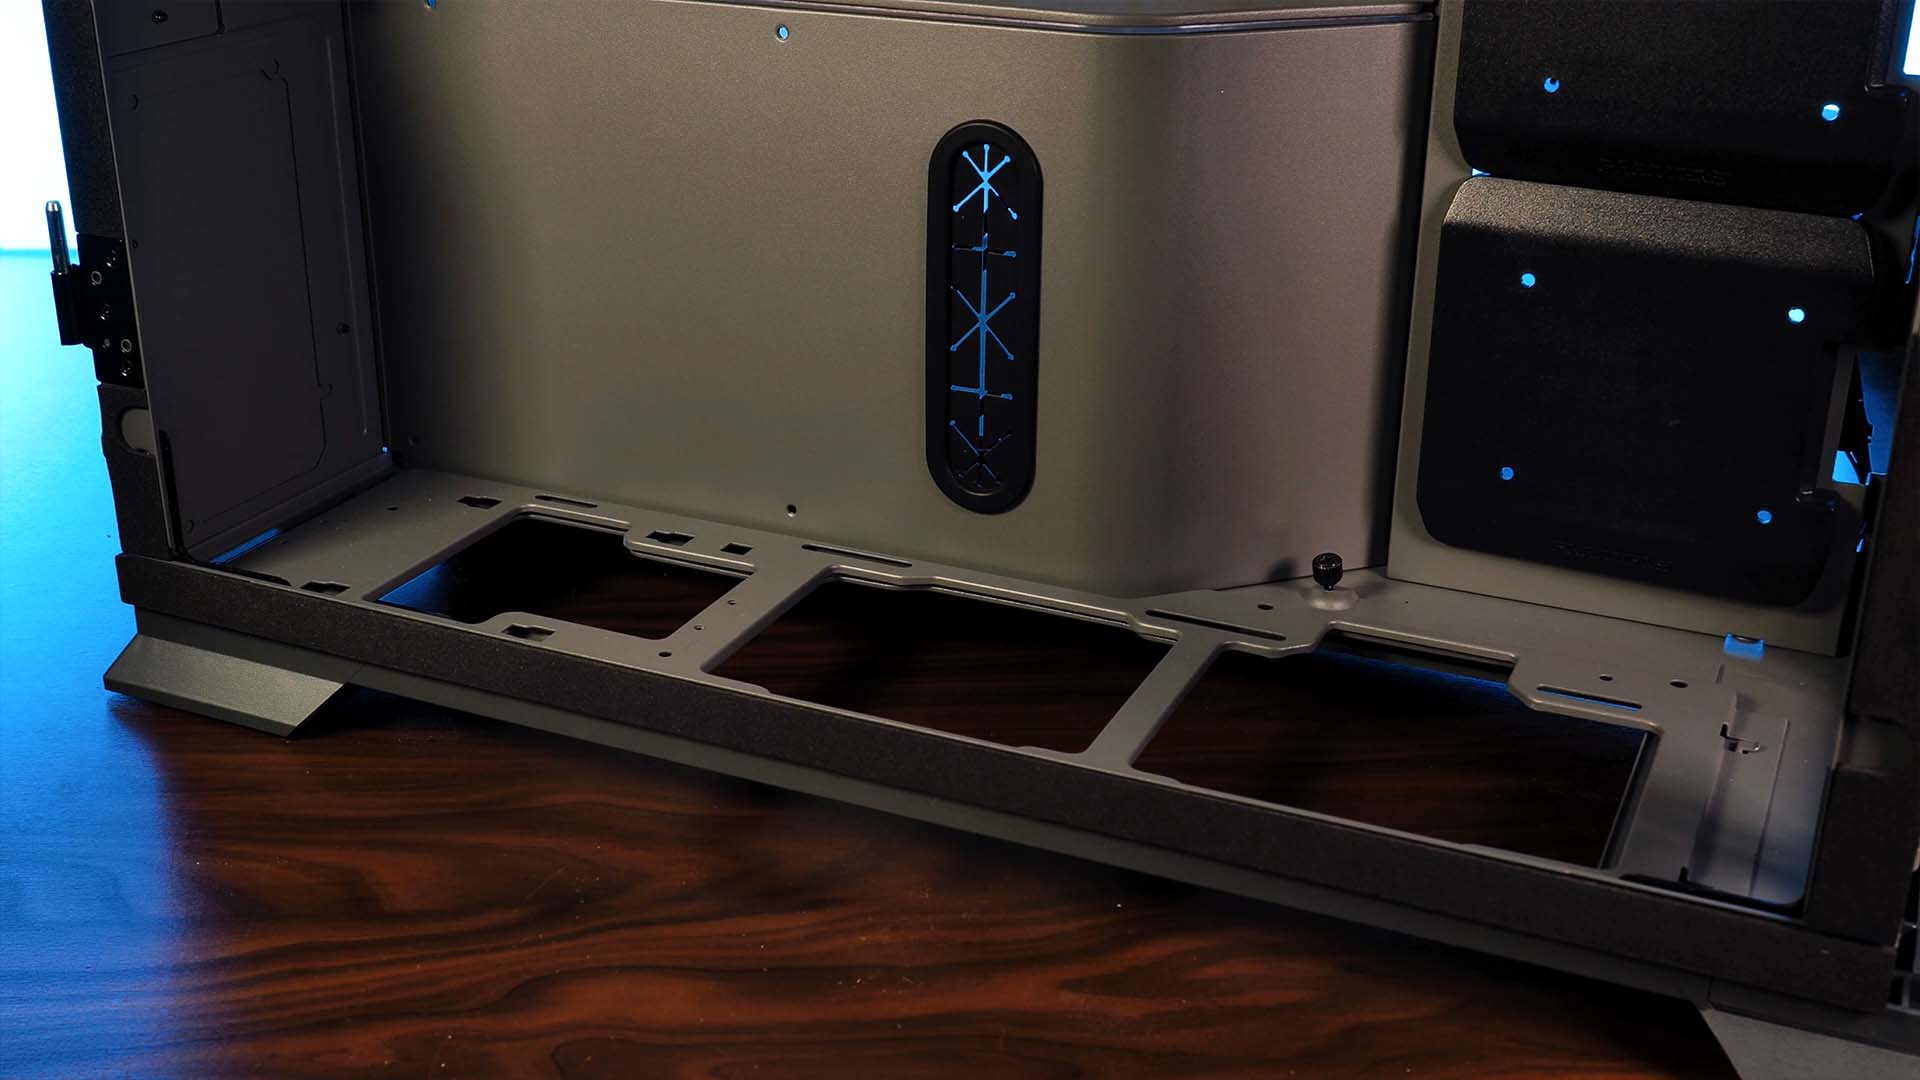
At the bottom, however, there are even more spots. 3x 120mm or 2x 120mm and a additional 140mm.

But Phanteks was still not done. Next to the motherboard area are 4 little black plastic Phanteks covers. After sliding them out by pinching the ends from behind the case, we will find even more fan spots. 4x 120mm Fans can be installed here.
And to top it off we have another fan spot for the back of the case. Here, we can install either a 120mm or 140mm fan.

If it wasn't apparent until now, this case can house a huge amount of fans.
Although the front and top panels of the case have sufficiently big air gaps on each side, the bottom of the case has an almost free-air-like intake. Just the bottom alone can already provide enormous amounts of air in a very convenient air path which will dramatically increase the case's cooling performance.

Each of the aforementioned Fan spots comes with its own fabric dust filter. To remove any of them it is sufficient to just full as each one is kept in place using little magnets. The only outliner would be the bottom filter which can be pulled out from the front of the case.
In the top (back) of the case, we've got another treat. There Phanteks installed a little fan hub providing you with 4x PWM and 3x 3-Pin headers for your fans. This hub needs to be powered by a SATA-Power cable and controlled using the out-sticking PWM connection.
Watercooling
The water cooling support inside the Enthoo 719 did not come short either.
While the front of the case can support up to 480mm or 420mm rands, the top and bottom fan spots can house 2x additional 360mm radiators. The Center however is quite outstanding as there we can mount an up to 480mm rad.
For the back, we are however back to the usual with a 120mm or 420mm radiator.

In case you want to create an excessive water-cooling loop, you are of course free to combine these spots and install multiple radiators on every fan spot maxing out both your radiator real-estate and cooling potential.
CPU Cooler

Due to the case's huge size, the CPU cooler height support ended up being huge as well. With an up to 195mm restriction, we are not aware of any CPU Air cooler that wouldn't fit into this case.
GPU

Just like the CPU cooler height restriction, the GPU length restriction is kind of a joke. With up to 503mm long cards (Radiator in the front not included), you can install whatever GPU you desire.
Drives

Although the case might not look like it, the amount of potential HDD/SSD spots makes this case a perfect candidate for a non-server-like data storage machine.
In the back of the case we have 3x SSD spots with brackets pre-mounted.

However, the beauty of the Enthoo lies within the HDD/SSD Brackets.
Included in the box, we got 4 of those modular and stackable brackets.

By sacrificing the fan spots in the central area, we can stack 2x of those brackets and install them on one of the fan spots. This can then be repeated a total of 4x making the side of the case house up to 8x SSDs/HDDs.
The bottom brackets meant for the fans also has prepared holes for those brackets. On this one, we can mount another 4x stack of these HDD/SSD brackets.
This puts the total count for HDD's at up to 12x and 15x for SSDs.

As you might have noticed, the Enthoo 719 comes with only 4x for these mounting brackets included. This naturally means that we are required to get additional brackets separately if we plan to create our own little/big NAS.
IO

The IO of the Enthoo is hidden behind a slidable cover at the front/top of the case which might initially look like it's an ancient CD/DVD driver cover.
Once we slide up the cover, however, we are greeted with a real treat.
4x USB 3.0 and 1x USB 3.1 Gen 2 Type C. A surprising amount of USB 3.0 for a normal case.
Cable Management

Usually, cable management is one of the most complicated topics within a case. Inside the Enthoo 719 however, the sheer size of the case allowed this to be a problem of the past.

Around the motherboard area, we've got the usual rubberized cable cutouts with some additional ones above the motherboard. Additionally, the vaulted area where the PSU will be installed behind has an additional rubberized hole. This can be used to either power the GPU or for the secondary system if you plan to use this feature.

The PSU will be installed in the back area of the case with an openable cover hiding all of your cable mess. Please note that the cover is not permanently fixed and can be removed by simply sliding it out.

As mentioned before, the case is huge. Therefore, stuffing the back of the case is not an issue. However, in case you don't want to be ashamed of your creation, Phanteks also included several little zip-tie slots and pre-mounted velcro strips to group all of your cables together.
Although it might be intriguing to just close the case once the PC can potentially boot, we would like to remind you that there's an additional piece of tempered glass that allows you to sneak-peak the back SSD spots. Due to this you might want to make use of all of those cable ties.
Cooling

The best word to describe the situation would be: impressive.
Due to the ridiculous amount of fan spots, we can create builds that move enormous amounts of air without any obstructions.
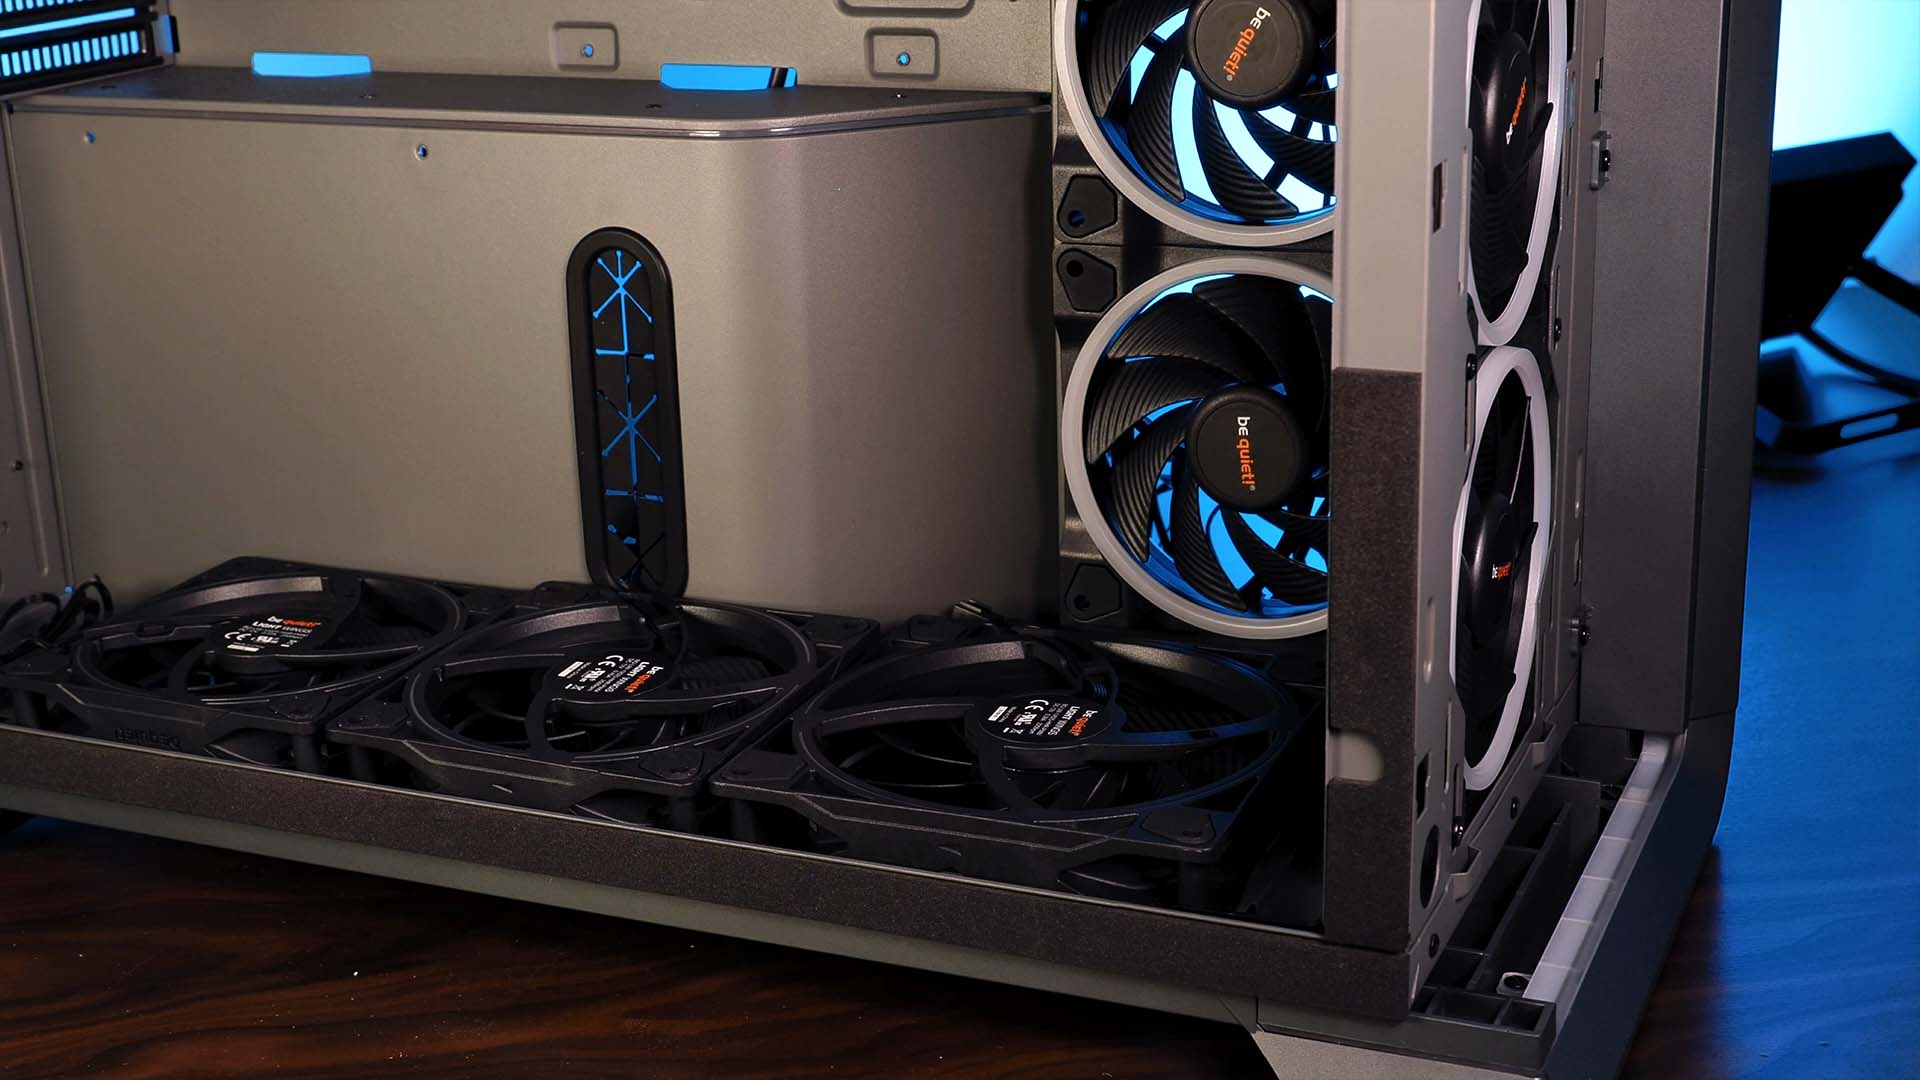
The most important aspect for us however are the bottom-mounted fans. Thanks to their strategic location they are able to move the air into the case while using natural convection to push the hot air out in the top. Additionally, these are also helping to get fresh air to the GPU Fans, something that is not always the case.

To put it short, the cooling capabilities inside the Enthoo 719 are just insane. The amount of air movable in and out of it will be more than sufficient for any build that you are planning. Therefore, let's just cut at a corner and say that the cooling part of this case is by far the best we have seen until today.
Design

The design of the Enthoo 719 is kept extremely simplistic. The front and top of the case is covered in a huge aluminum plate with two plastic rails spanning over each side from top to bottom and to the back.
Between these bars and the plates are the big air gaps that allow the air to float into the case and create a sort of protruding design for the plates.

On the RGB side, Phanteks also did some work. Between the plates and rails on the right side, there is a very thin line or RGB that is traveling from top to bottom and making the bottom corner. The same type of line can also be found on the out-sticking PSU cover.
In our opinion, this very simplistic usage of RGB seems to be incredibly appealing. It provides a sort of 'clean' look without any exaggerated design aspects. A design we can truly stand behind.

Another very positive aspect in our opinion is the out-sticking plate that covers the PSU. Due to its shape and form, it simultaneously creates a design that looks like a little throne for the motherboard which we found very appealing.
All in all, we were happy with the design of the Enthoo 719 case. Its simple looks paired with the thin RGB lines are exactly what were are looking for when building a monster of a performance machine.
Conclusion

Although the Enthoo 719 was already praised enough, there are few more things that wanted to point out.
One of these things is the included RGB controller. By using the buttons hidden inside the IO panel, you can control the colors and modes of the RGB lines that are distributed across the case. However, Phanteks made sure to add expansion ports in case you want to add more RGB to that. In order to do so, you can either use the Phanteks proprietary DRGB port which is sticking out behind the motherboard area, or you can use the 3-Pin ARGB header located at the same spot. By adding that last 3-Pin ARGB header Phanteks made sure that you can use whatever Fans or other devices you wish without forcing you to stay within Phanteks's own product lineup. A decision that we liked a lot.

Another positive point about the Enthoo 719 is that you have the possibility to make sure that the Side Panels will not open at all. Out of the box, the case comes in this state.
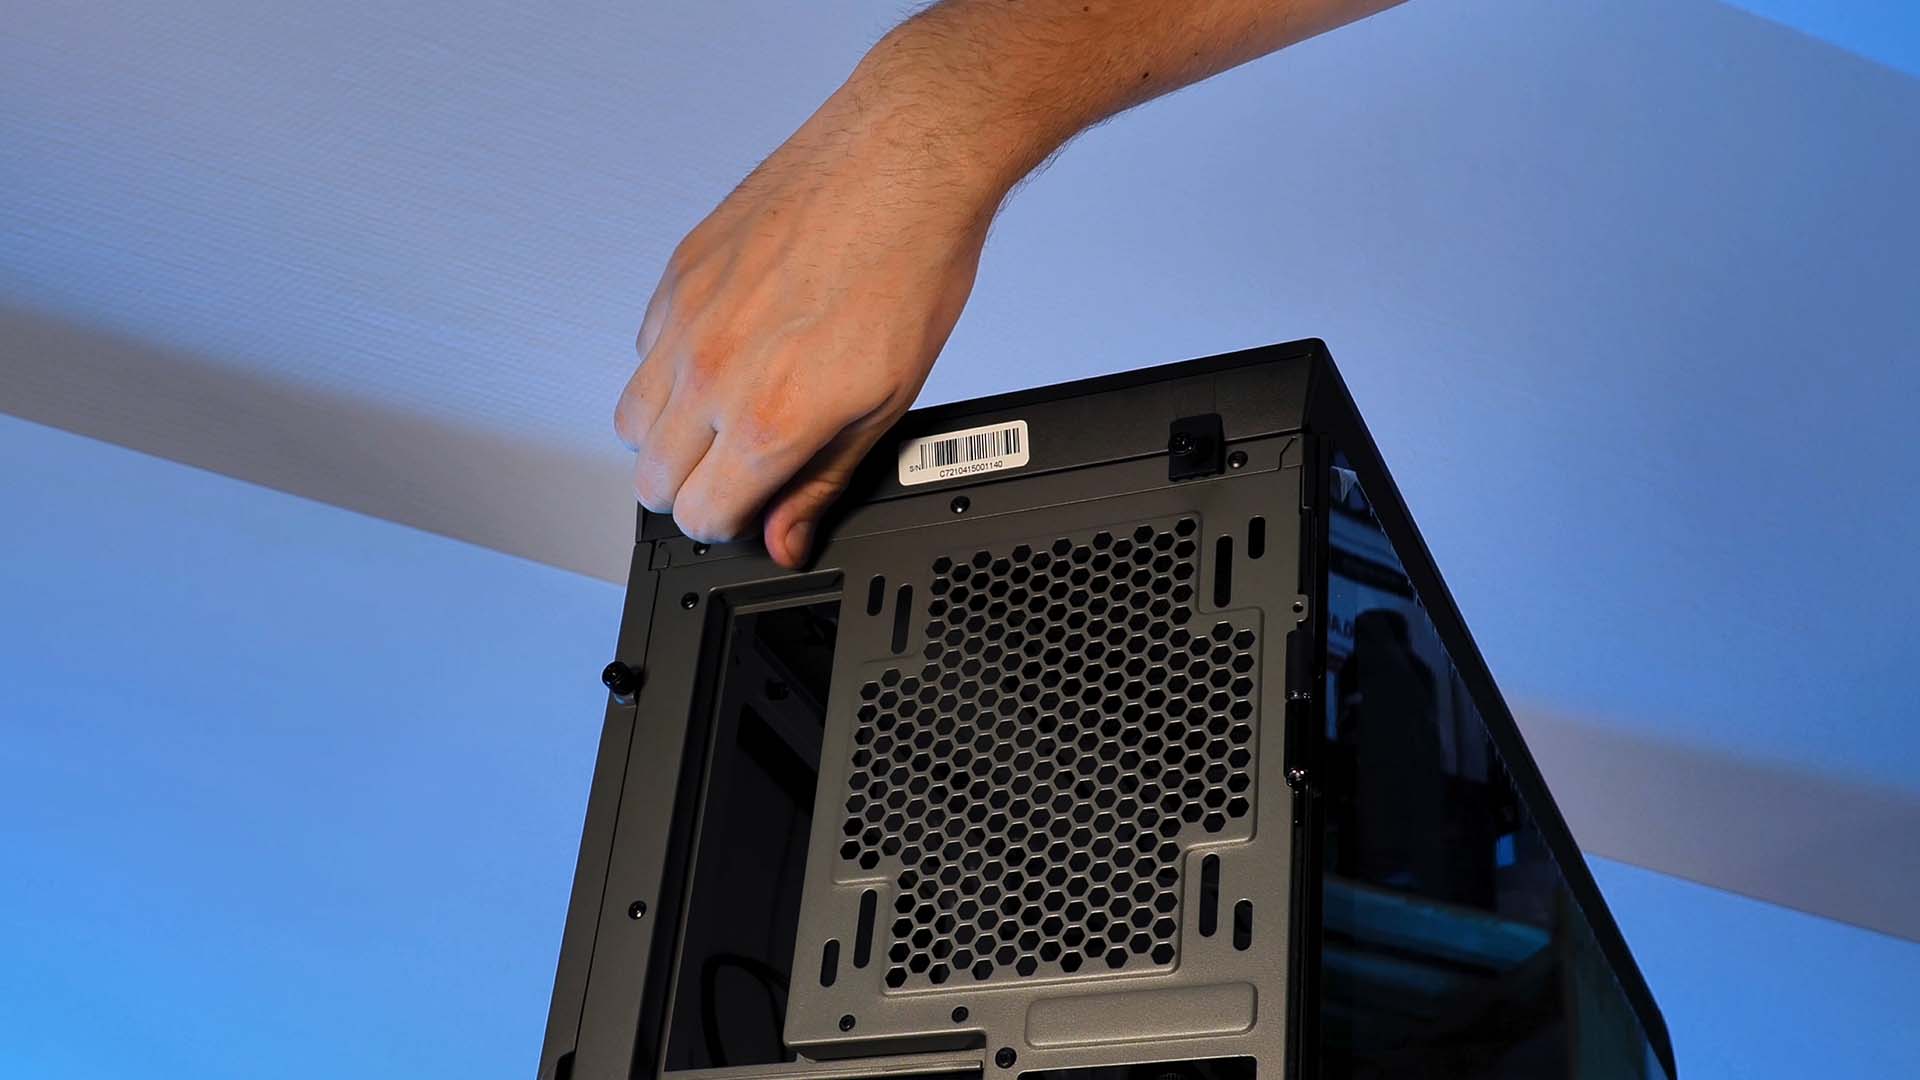
By unscrewing the top panel in the back of the case you can slide it out which then allows you to slide the front panel to the top. Upon doing so you will be greeted by a screw on the right side which keeps the side panel in place and makes it secure for transportation.

Although we would not re-attach this screw after finishing a build, we welcome the possibility to make sure that no other person might open it and tamper with any of the components.

And the last highly appreciated extra of this case are the Fan brackets. Both the Top and Bottom Fan spots are completely removable from the case by one or two simple screws. Removing it allows us to install the fans or radiators outside of the case which makes this a lot easier than inside other cases.

However, not everything can be gold. As we found, the Front and Top panels of the case got a massive coat of paint on them. This fact paired with the plastic rails around these panels gave us the illusion that the entire outside of the case is made out of plastic. Although this is not the case as both panels are made out of aluminum (and yes we purposefully scratched them to find out), we believe that this negative illusion is detrimental to the overall look and feel of the case. Thankfully the RGB lines and other aspects of the case are able to counter this feeling, but we found that to be a sad thing considering the overwhelming capabilities of the case.

Ignoring that last little hiccup, we are overall very happy with the case. The Enthoo 719's cooling capabilities combined with its compatibilities in terms of GPU, Motherboards and CPU Cooler sizes are truly outstanding and worthy of a recommendation from our side.
The only thing we would have liked is at least 1x included fan. Though considering the price of the Enthoo 719 compared to Evolv X, we can neglect that.


Alphacool Core 120 4000RPM Review
While the Core 120 2500 was mediocre, the 3000RPM version had at least some headroom. Now lets see if we can maximize it on t
Read More
Montech Metal DT24 Premium Review
Montech managed to skyrocket in the PC Case market within the last few years. But what about CPU Air coolers? Lets take a clo
Read More
Alphacool Core Ocean T38 420 Review
Alphacools Core Ocean T38 series has not been the most high-performance series of AIO of this year. But the 420mm edition mig
Read More
be quiet! Silent Wing Pro 4 120 Review
be quiet!s newest Silent Wing 4 iteration promises excellent cooling performance while maintaining the Noise Level be quiet!
Read More